Mt Asahidake · Routes
↘ Asahidake — Sugatami → Summit
This route carries serious backcountry hazards. Its slope and ATES labels are planning estimates; they do not decide whether it is safe today or suitable for your group.
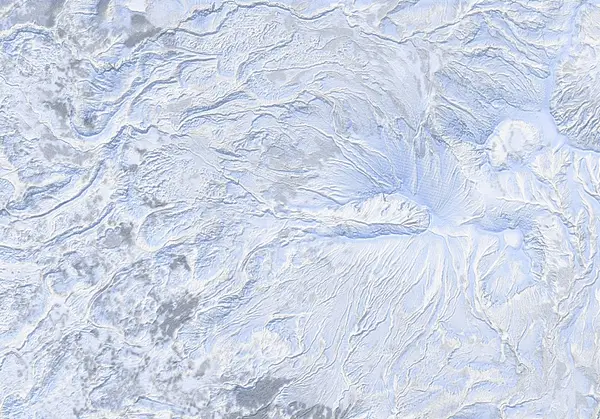 出典:国土地理院(標高タイル dem5a + DEM10B を加工して作成)
Steepness · profile
← Distance 5.7 km →
Per-segment terrain (data table)
| % | m | Steepness | Aspect |
|---|---|---|---|
| 0% | 1601 | 22° | W |
| 3% | 1610 | 12° | SE |
| 6% | 1619 | 13° | W |
| 9% | 1630 | 25° | SW |
| 13% | 1672 | 29° | W |
| 16% | 1697 | 25° | W |
| 19% | 1740 | 30° | W |
| 22% | 1782 | 32° | W |
| 25% | 1838 | 39° | W |
| 28% | 1895 | 38° | NW |
| 31% | 1951 | 35° | W |
| 34% | 2016 | 39° | W |
| 38% | 2066 | 38° | SW |
| 41% | 2114 | 36° | NW |
| 44% | 2181 | 36° | SW |
| 47% | 2224 | 47° | S |
| 50% | 2270 | 35° | S |
| 53% | 2286 | 47° | SW |
| 56% | 2242 | 36° | S |
| 59% | 2202 | 36° | S |
| 63% | 2136 | 35° | W |
| 66% | 2084 | 39° | SW |
| 69% | 2034 | 39° | SW |
| 72% | 1972 | 35° | W |
| 75% | 1923 | 38° | W |
| 78% | 1863 | 39° | W |
| 81% | 1799 | 32° | NW |
| 84% | 1757 | 25° | SW |
| 88% | 1707 | 29° | W |
| 91% | 1671 | 25° | NW |
| 94% | 1635 | 16° | W |
| 97% | 1622 | 12° | SW |
| 100% | 1611 | 22° | SW |
Route guide
Asahidake (2291 m) is the highest peak of the Daisetsuzan range, and this Sugatami → Summit line is an alpine-the-whole-way tour. It starts at the Sugatami ropeway upper station (~1600 m), follows the south ridge above the Jigokudani basin, and climbs about 692 m of vertical over roughly 6.0 km one way to the summit at 2291 m. The aspect is west to southwest (mean ~259°, with the descent spreading across W/NW/SW). Hokkaido Wilds rates this approach 'Challenging,' but the ground itself is classed ATES 'complex' (Level 3) — unambiguous avalanche terrain — so read this as a description of the terrain and its hazards, not a recommendation.
[Sugatami station / Sugatami-no-Ike — ~1600 m] You set off near the Sugatami-no-Ike Viewpoint, with the Public Toilets (~1596 m) right alongside; this is the practical base, governed by the last ropeway car. You are above treeline from the very first step, with no forest to break the wind. The terrain looks gentle in outline, but the mean angle is about 31°, so it is an alpine tour from the start.
[Crossing above Jigokudani — ~1600–1900 m] The route gains height by traversing ABOVE the active fumarole basin of Jigokudani ('Hell Valley'). This is the route's defining, site-specific hazard. The vents emit volcanic gas (hydrogen sulphide H2S and sulphur dioxide SO2); thin snow bridges form over warm ground and can collapse, dropping you into a steam vent. Stay upwind at all times and never approach a steaming vent. The Asahidake Stone Hut (emergency use only) sits at about 1667 m — it is a refuge, not an overnight hut.
[Upper cone and false summit — ~1900–2200 m] Above the fumaroles you move onto the open, exposed W–SW cone. Wind on this unsheltered face is extreme, and wind slab builds readily on the lee (E–NE) aspects. The cold continental Daisetsuzan snowpack harbours a persistent weak layer (facets / depth hoar) that can hide beneath the surface crust. A false summit short of the true top will fool you into thinking you have arrived in poor visibility; the true Asahidake Summit is 2291 m.
[Reading the 79° max-slope figure] Note that this route's 79° maximum-slope figure almost certainly includes short, steep crater / fumarole-wall sections rather than the skin line itself. In the data, only 14 of 632 points exceed 45°, and the median is about 31°. The descent will feel far gentler than that peak number — but on the wind-hammered upper face, a fall on hard crust and sastrugi is itself a serious hazard.
[Descent — the critical caution: aspect and whiteout] The upper mountain is an isolated volcanic cone, with near-identical, featureless slopes falling away on every side. In flat light (overcast, fog, or ground blizzard that erases all shadow and texture) it is easy to confuse the W–SW face you climbed with an adjacent aspect and ski into the wrong drainage — the classic mistake on an isolated cone. With windchill the temperature drops below −20°C, and rapid whiteouts are frequent. Confirm your descent bearing with GPS and compass, and lose height one stage at a time so you are not drawn back over Jigokudani. Check the Japan Avalanche Network (JAN) Central Hokkaido / Daisetsuzan bulletin and make your own stability assessment and judgement.
Access & logistics
Trailhead & parking: The line begins at the Asahidake Ropeway upper station, Sugatami (~1600 m). There is parking at the lower ropeway terminal; the normal approach is to ride the ropeway up to Sugatami rather than skin in from the base. Winter parking availability, capacity and ropeway operation depend on weather and snow-clearing, so check current conditions before you go.
Getting there: The standard approach is to drive to Asahidake Onsen from the Asahikawa / Higashikawa side and take the ropeway. Expect ice and snow on the roads in winter — winter (studless) tyres and/or 4WD are appropriate. The ropeway can be suspended in high wind, so confirm operating status in advance.
Descent point: Many parties do not push to the summit; they read the upper-cone conditions (hard crust, high wind, visibility) and turn to ski from a sensible elevation. The traverse above the Jigokudani fumaroles and the ground before the false summit are natural decision points.
After: Asahidake Onsen has several inns offering day-use baths, and there are eateries toward Higashikawa. Hours, winter closures and the last ropeway car all vary by season — confirm them yourself.
Today / tomorrow briefing
Loading…
Set reminders inside Google Calendar
Hokkaido Wilds · Rob Thomson — HokkaidoWilds.org · CC BY-SA 4.0
A planning aid, not a verdict. Always check the day’s official avalanche bulletin and decide in the field.
Route data source: Rob Thomson — HokkaidoWilds.org · CC BY-SA 4.0